

Equipment
The equipment library
The IMS equipment library contains all devices that can be used or deployed on science voyages. To distinguish different devices they are subdivided. Devices fall under different equipment types and equipment type families, and these equipment type families fall into one or more main categories.
Main categories
| Standard equipment | Equipment that does not qualify for any of the below categories |
| Container equipment | Equipment that can hold one or more other devices (e.g. ROV frames or boxes). See <PAGE URL> for a list of container equipment. |
| Mooring equipment | Equipment that is suitable for mooring deployment (e.g. landers, current profilers or buoys). |
| Generic equipment | Equipment that is available in significant numbers or different versions (e.g. boxes, current profilers or acoustic releases). See <PAGE URL> for how to create an equipment template. |
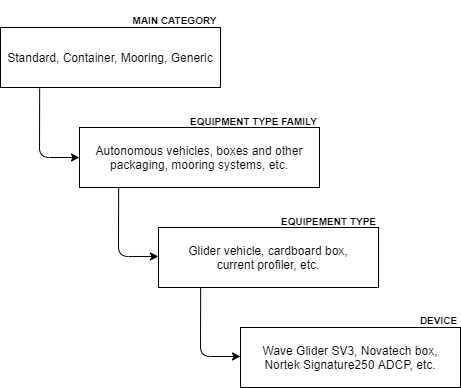
Fig. How devices are subdivided in the IMS.
Equipment overview
The equipment overview page shows all equipment currently present in the database. The top bar offers equipment related actions:
| Button | Description |
| New | Add new equipment to the database |
| Reporting | Create different types of equipment related posts |
| Bulk edit | Edit specific equipment properties for multiple items at once |
| Custom filters | Create custom filters based on usage, project, customs type and maintenance status |
| Select columns | Show or hide specific columns |
| Location | Switch equipment storage location |
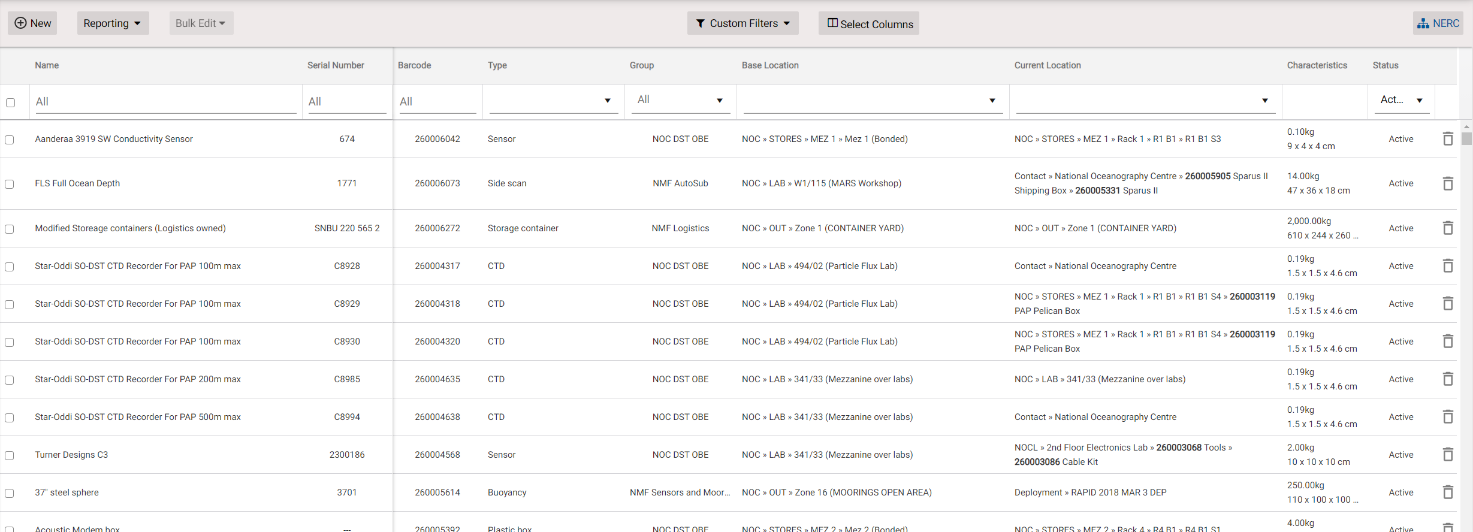
Fig. Equipment Overview example.
Add new equipment
Before you add a new device to the database, check if it already exists in order to prevent duplicates. You can do this by:
- consulting with colleagues.
- checking if the device is already marked with an MFP barcode.
- searching on the device name or serial number. Be aware that entering a serial number for equipment is not mandatory.
NOTE: If you find a device without barcode in the database, generate a barcode and label the device if possible.
Start adding a new device by clicking the ‘New’ button. This shows multiple forms (e.g. Details, Financial, Customs, Asset). The available forms may vary by organization. Fill in the forms as completely as possible. This makes it easier to find the device at a later stage.
After saving the forms, additional forms will appear (e.g. Work History, Maintenance and Tracking).
For a complete overview of the different forms and field, see <PAGE URL>.
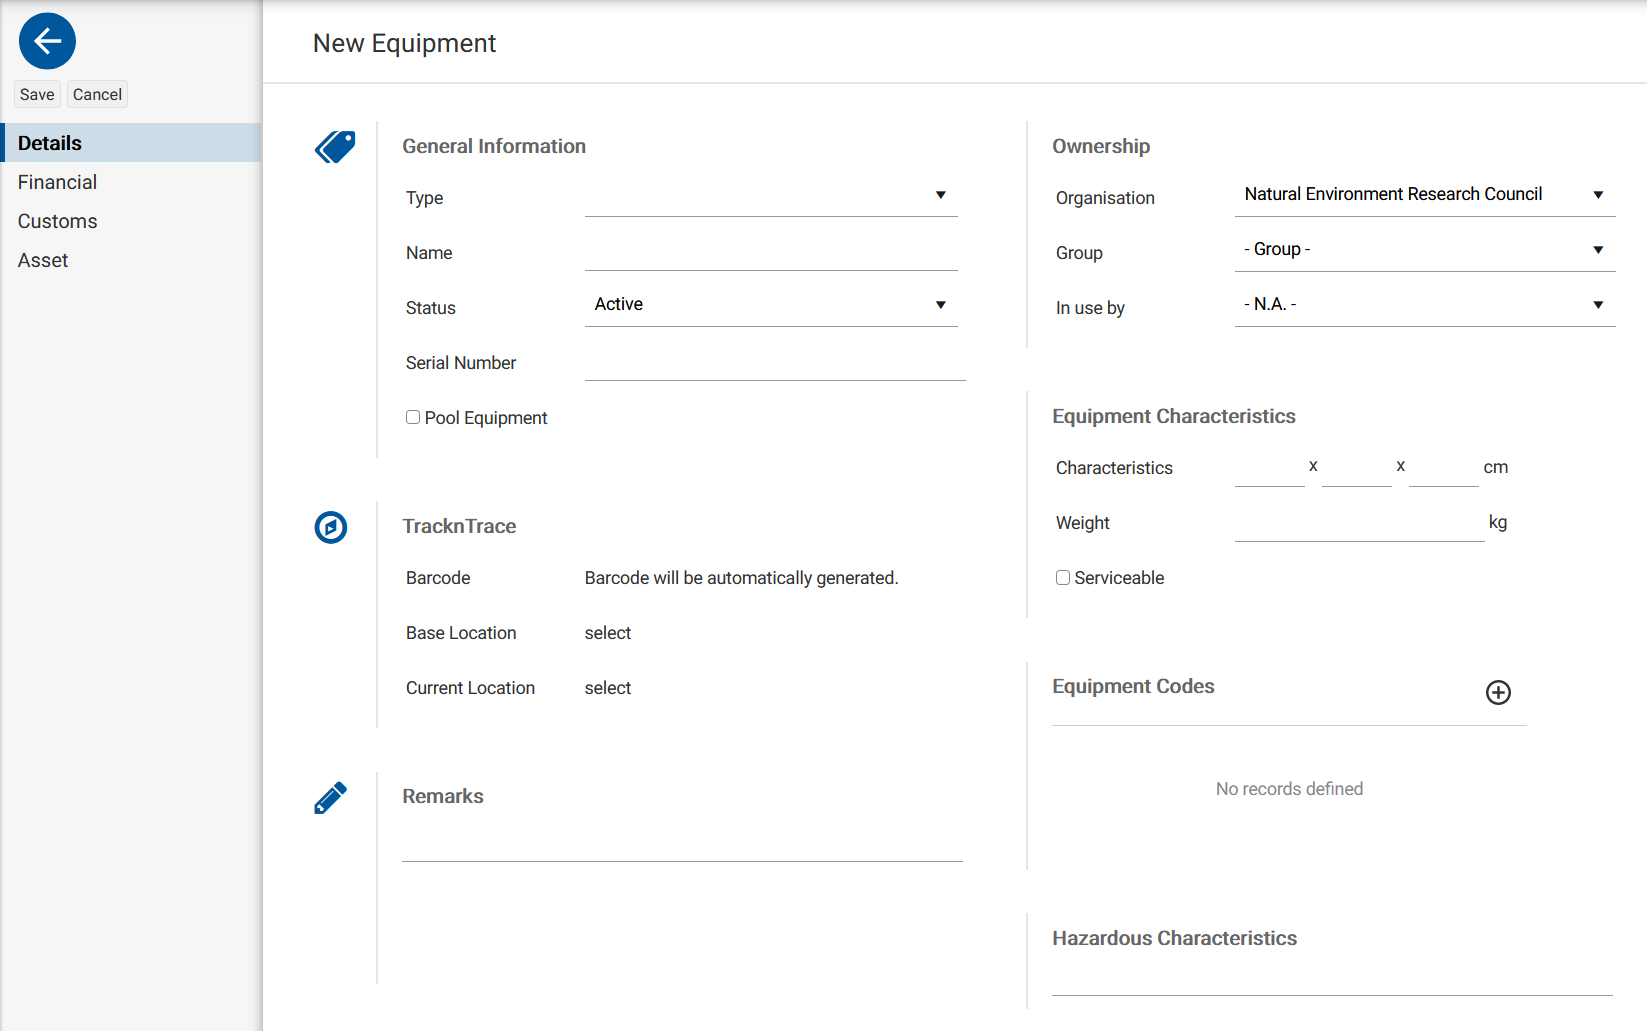
Fig. New Equipment page.
Archiving equipment
Newly added equipment automatically receives the ‘Active’ status. If a device is discarded or lost, this status must be set to ‘Discarded’ or ‘Lost’ accordingly on the equipment details form. This archives the device which means that it is no longer available for planning.
Archived equipment can be reactivated at any time by changing its status. The status change date and executing user are registered and can be viewed in the status change history.

Fig. Equipment status history example.
Deleting equipment
The current manual states that the status has to be changed to ‘Discarded’ or ‘Lost’ before deletion. Is this true?
Equipment forms and fields
The following is a list of form fields and their descriptions. The fields and input options available may vary by organization.
Equipment details form
| Field | Description |
| Type | This is a list of predefined equipment types. If a template is available for the selected type, an additional field called ‘Generic Equipment’ appears. See <PAGE URL> for how to create an equipment template. |
| Name | The name of the device |
| Status | ADD DESCRIPTION |
| Serial number | The serial number of the device |
| HS code | An international standardized code for classifying products |
| Export license required | Check if an export license is required for this device |
| Pool equipment | Check if the equipment belongs to an equipment pool |
| Barcode | The MFP barcode of the device |
| Base location | The storage location of the device |
| Current location | The current location of the device |
| Remarks | Additional information in regards to the device |
| Organization | The organization that owns the device |
| Group | ADD DESCRIPTION |
| In use by | The user who is currently using the device |
| Characteristics | The dimensions of the device |
| Weight | The weight of the device |
| Serviceable | ADD DESCRIPTION |
| Equipment codes | Addition code (e.g. IMEI for mobile equipment |
| Hazardous characteristics | UN numbers for when the device contains hazardous content |
Equipment financial form
| Field | Description |
| Nett. Purchase price | Net purchase price of the device |
| Purchase date | Purchase date of the device |
| Order number | The supplier order number |
| Requisition number | The internal order number of the organisation |
| Supplier | The supplier of the device |
| Manufacturer | The manufacturer of the device |
| ZVAT | ADD DESCRIPTION |
| Funding | ADD DESCRIPTION |
| Project | ADD DESCRIPTION |
| Asset number | ADD DESCRIPTION |
| Asset note | ADD DESCRIPTION |
Equipment customs form
| Field | Description |
| Customs price | The value used for calculating import duties |
| Tariff | ADD DESCRIPTION |
| Customs type | Free or bonded |
| HS code | An international standardized code for classifying products |
| Export license required | ADD DESCRIPTION |
| Country of origin | The country of production |
| Customs description | A short description of the device |
| Remarks | Additional customs information in regard to the device |
| Customs codes | Additional customs codes |
| BAFA Güter-ID | ADD DESCRIPTION |
| ECCN | ADD DESCRIPTION |
| Zutreffende AL | ADD DESCRIPTION |
Equipment asset form
| Field | Description |
| Asset number | ADD DESCRIPTION |
| Asset code | ADD DESCRIPTION |
Equipment mooring form
| Field | Description |
| Buoyancy | ADD DESCRIPTION |
| Max. depth | The maximum mooring depth of the device |
| Height | ADD DESCRIPTION |
| Checklist | ADD DESCRIPTION |
Equipment work history page
Here you can register work carried out on the device.
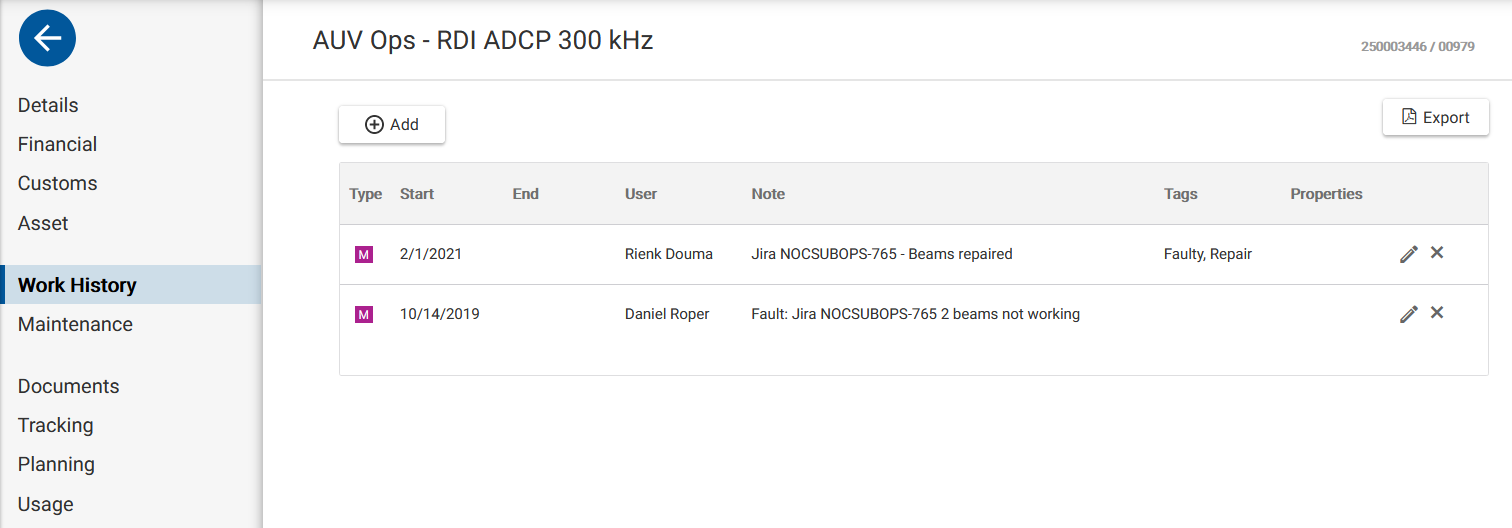
Fig. Work history page example.
Equipment maintenance page
Here you can schedule and register maintenance events for the device. See <PAGE URL> on how to manage device maintenance and repair.

Fig. Maintenance page example.
Equipment documents page
Here you can upload device related documents such as data sheets, user manuals, calibration certificates and pictures.
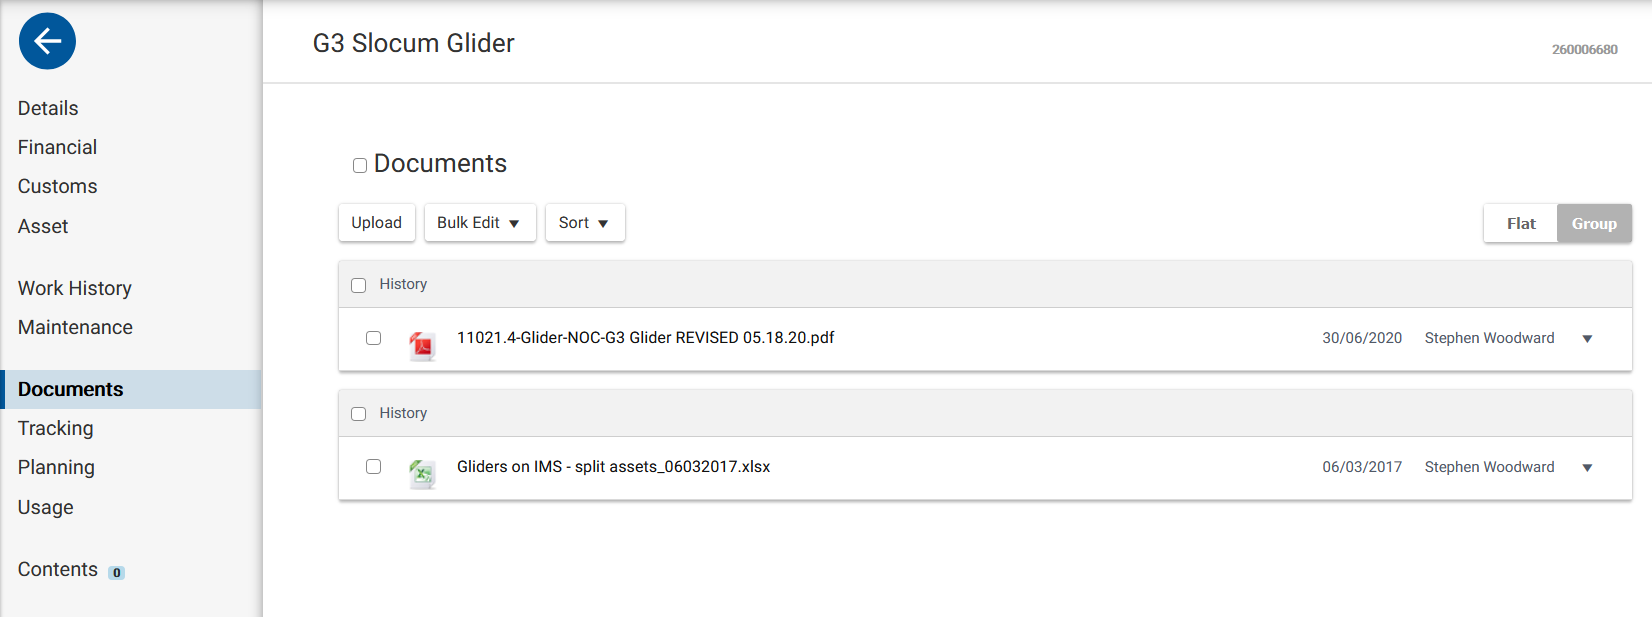
Fig. Documents page example.
Equipment tracking page
Here you can find the movement history of the device such as previous locations, transport dates and responsible persons.
Used symbols:
| Ship / Voyage / Cruise | |
| External Contact | |
| Transport | |
| Home Contact | |
| Internal Location |

Fig. Tracking page example.
Equipment planning page
Here you can see if the device is already planned for cruises, transports or mooring deployment. You can also plan or register a maintenance event as an appointment blocker. For detailed maintenance management see <PAGE URL>.
Color codes:
| External contact | |
| Transport | |
| Voyage or Cruise |
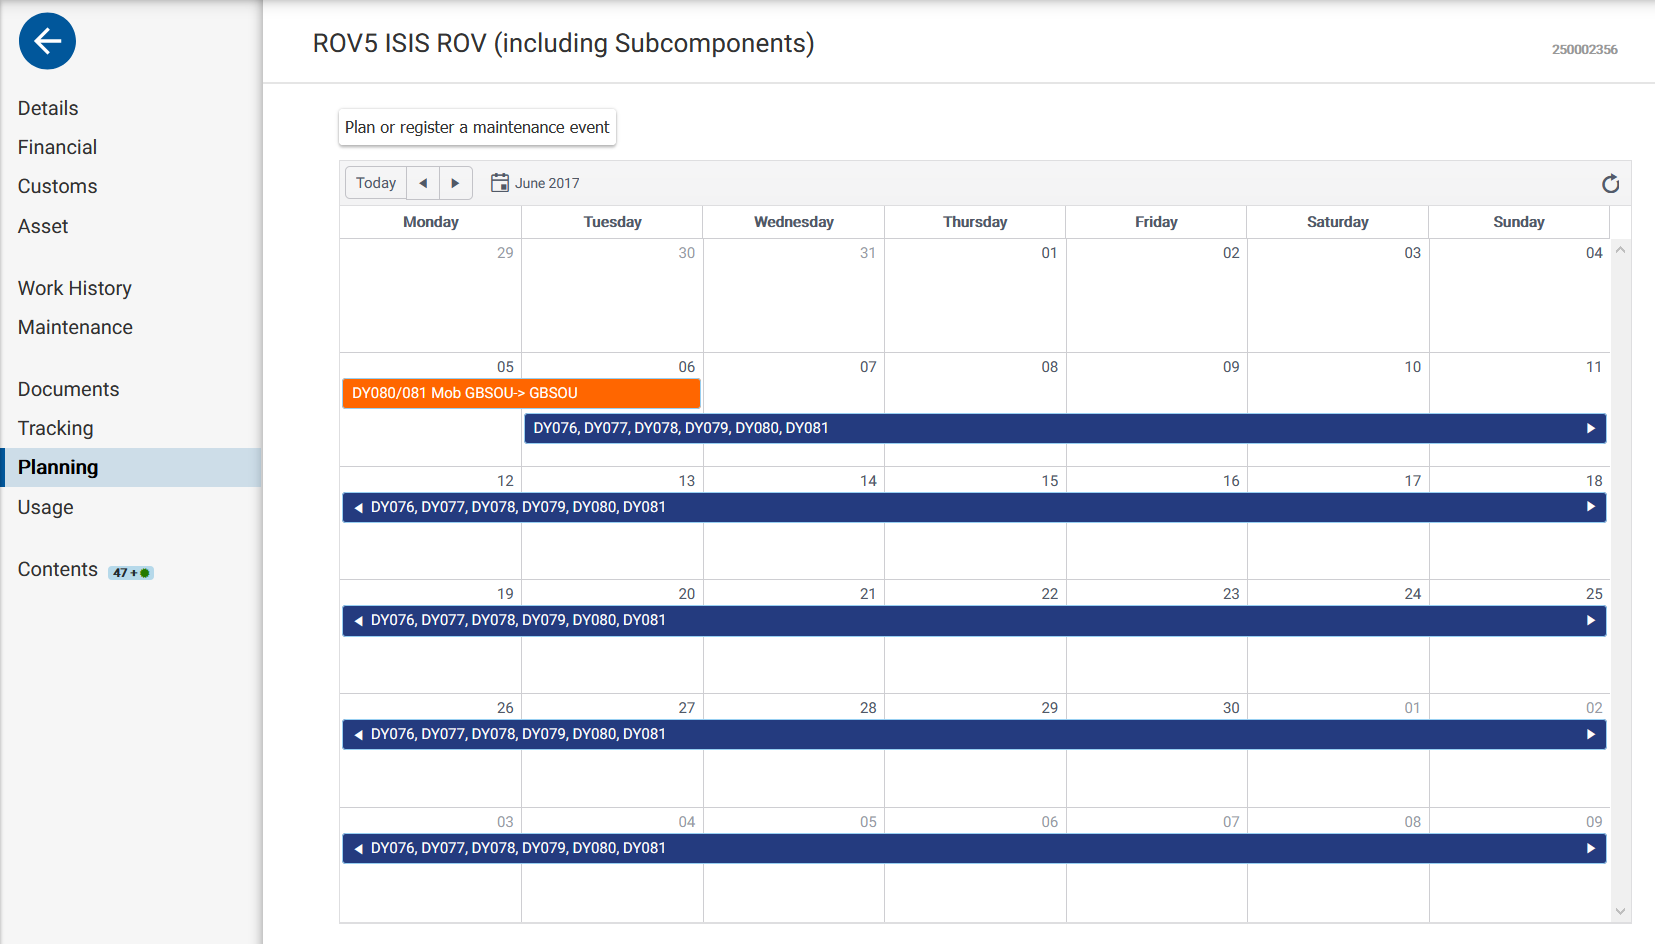
Fig. Planning page example.
Equipment usage page
Here you can see the current user and user history of the device.

Fig. Usage page example.
Equipment contents form
Here you can see a contents list for the device. Managing of the contents can be done on the Tracking page. See <PAGE URL> for how to manage the contents.
NOTE: The Tracking page is the main tracking page, accessed from the menu to the left. This is a different page than the equipment tracking page, accessed through a specific device.
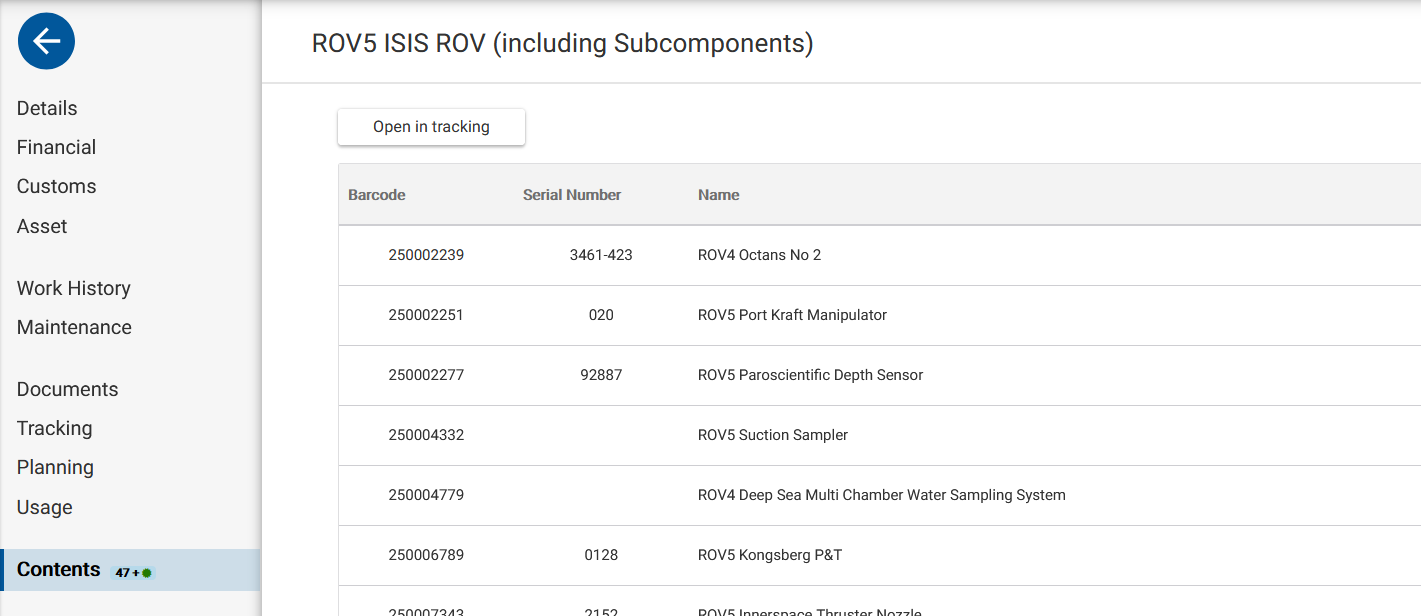
Fig. Contents form example.
Equipment maintenance and repair
Some devices require maintenance or need repair after being damaged. This can be periodic maintenance, pre or post deployment maintenance or maintenance needed because the device does not function properly anymore. But also calibration or inspection of the device are maintenance events.
Equipment maintenance or repair is managed at the ‘Maintenance’ page of a device. Here you will see two tabs: ‘Maintenance’ and ‘Maintenance Policy’.
On the ‘Maintenance’ tab you can see an overview of past and upcoming events, and add or plan corrective maintenance events. Use ‘Add corrective maintenance event’ when the maintenance is already done and you want to register the event. Use ‘Plan corrective maintenance event’ if you want to plan an event that falls outside the maintenance policy scope.
On the ‘Maintenance Policy’ tab you can add new maintenance definitions. Use this for periodic maintenance events or pre and post deployment maintenance.
Color coding used on the ‘Maintenance’ tab:
| Maintenance is postponed. | |
| The due date for the maintenance expires soon. | |
| The due date for the maintenance is expired. | |
| Unscheduled maintenance event. |
An overview of all maintenance events for equipment can be found on the home page under ‘Maintenance’.
Add a corrective maintenance event
Click the ‘Add corrective maintenance’ button to register a new event. Fill in the form as completely as possible. Click ‘Save’ when you are done.
| Field | Description |
| Name | The name of the event |
| Duration | The time it took to perform the maintenance |
| Reason for repair | Select a reason from the list |
| Safety related | Check if the maintenance is needed to secure safety |
| External contractor | Check if the maintenance is done by an external contractor |
| Contact* | Select an external contractor from the list of contacts |
| Add file | Add images or documents related to the event |
| Notes | Additional information in regard to the event. |
* Only available when external contractor is checked.

Fig. Add corrective maintenance event form.
Plan a corrective maintenance event
Click the ‘Plan corrective maintenance’ button to plan a new event. Fill in the form as completely as possible. Click ‘Save’ when you are done.
| Field | Description |
| Name | The name of the event |
| Time expected to perform work | The time it took to perform the maintenance |
| Reason for repair | Select a reason from the list |
| Description | A description of the event |
| Safety related | Check if the maintenance is required due to safety reasons |
| Equipment is not operational | Check if the device is not operational due to the reason for repair |
| External contractor | Check if the maintenance is conducted by an external contractor |
| Expected time out of action1 | The expected number of days the device will be out of action |
| Contact1 | Select an external contractor from the list of contacts |
| Add file | Add images or documents related to the event |
| Next usage | Select when the maintenance should be conducted before the next usage |
| Due date | Select when the maintenance should be conducted before a specific date |
| Before2 | Enter the date before which the maintenance should be conducted |
1 Only available when external contractor is checked.
2 Only available when due date is selected.
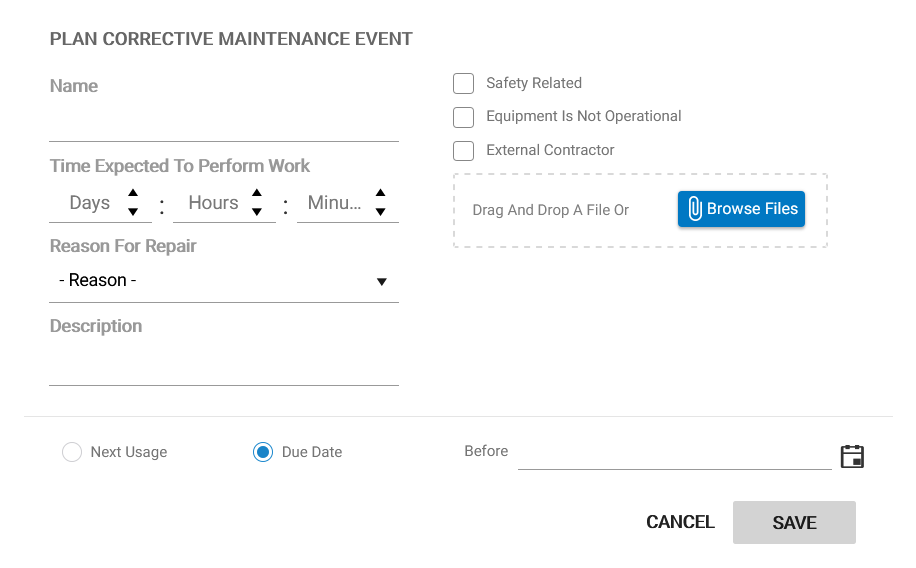
Fig. Plan corrective maintenance form.
Add a new maintenance definition
Click the ‘Add new maintenance definition’ button to plan a new event. Fill in the form as completely as possible. Click ‘Save’ when you are done.
| Field | Description |
| Name | The name of the maintenance definition |
| Notify before expiry (days) | The number of days before expiry of the event when a notification must be given |
| Time expected to perform work | The expected time for performing the maintenance |
| Safety related | Check if the maintenance is required due to safety reasons |
| Environment related | Check if the maintenance is required due to environmental reasons |
| Legal requirement | Check if the maintenance is required due to legal reasons |
| Calibration | Check if it is a calibration event |
| Periodic interval | Check if it is a periodic event |
| Conduct every | Select the period after which the maintenance has to be conducted |
| Start on | Enter the date when the first maintenance event should be conducted |
| Maintenance needed to be conducted at start date | Check if the maintenance must be conducted at the start date |
| Automatically defer maintenance after expiry | Check if the maintenance should be automatically deferred when the due date is expired. |
| Activity / usage | Check if the maintenance should be conducted before or after deployment |
| Post-deployment | Check if the maintenance should be conducted after deployment |
| Pre-deployment | Check if the maintenance should be conducted before deployment |
| Add file | Add images or documents related to the event |
| Description | A description of the event |
| Required capability | Select required capability from the list |
| External contractor | Check if the maintenance should be conducted by an external contractor |
| Expected time out of action1 | The expected number of days the device will be out of action |
| Contact1 | Select an external contractor from the list of contacts |

Fig. Add new maintenance definition form.
Notifications
If you want to receive notifications for maintenance events, click the ‘Subscribe to notifications’ button to the ‘Maintenance’ main page. When you are subscribed, notifications will appears on the home page and in your email.
![]()
Add contents to container equipment
Devices labeled as container equipment such as ROV’s, AUV’s, boxes and lander frames can have contents. For example, an ROV can have thrusters, flotation vehicles, sensors and samplers as contents. Or a cardboard box can carry different consumables.
Follow these steps to add contents to a container device:
- Select the container device or create a new one.
- Go to the equipment contents page and click the ‘Open in tracking’ button. This brings you to the tracking page with on the left side of the screen your selected container device. On the right side you can browse through locations and search for the required contents.
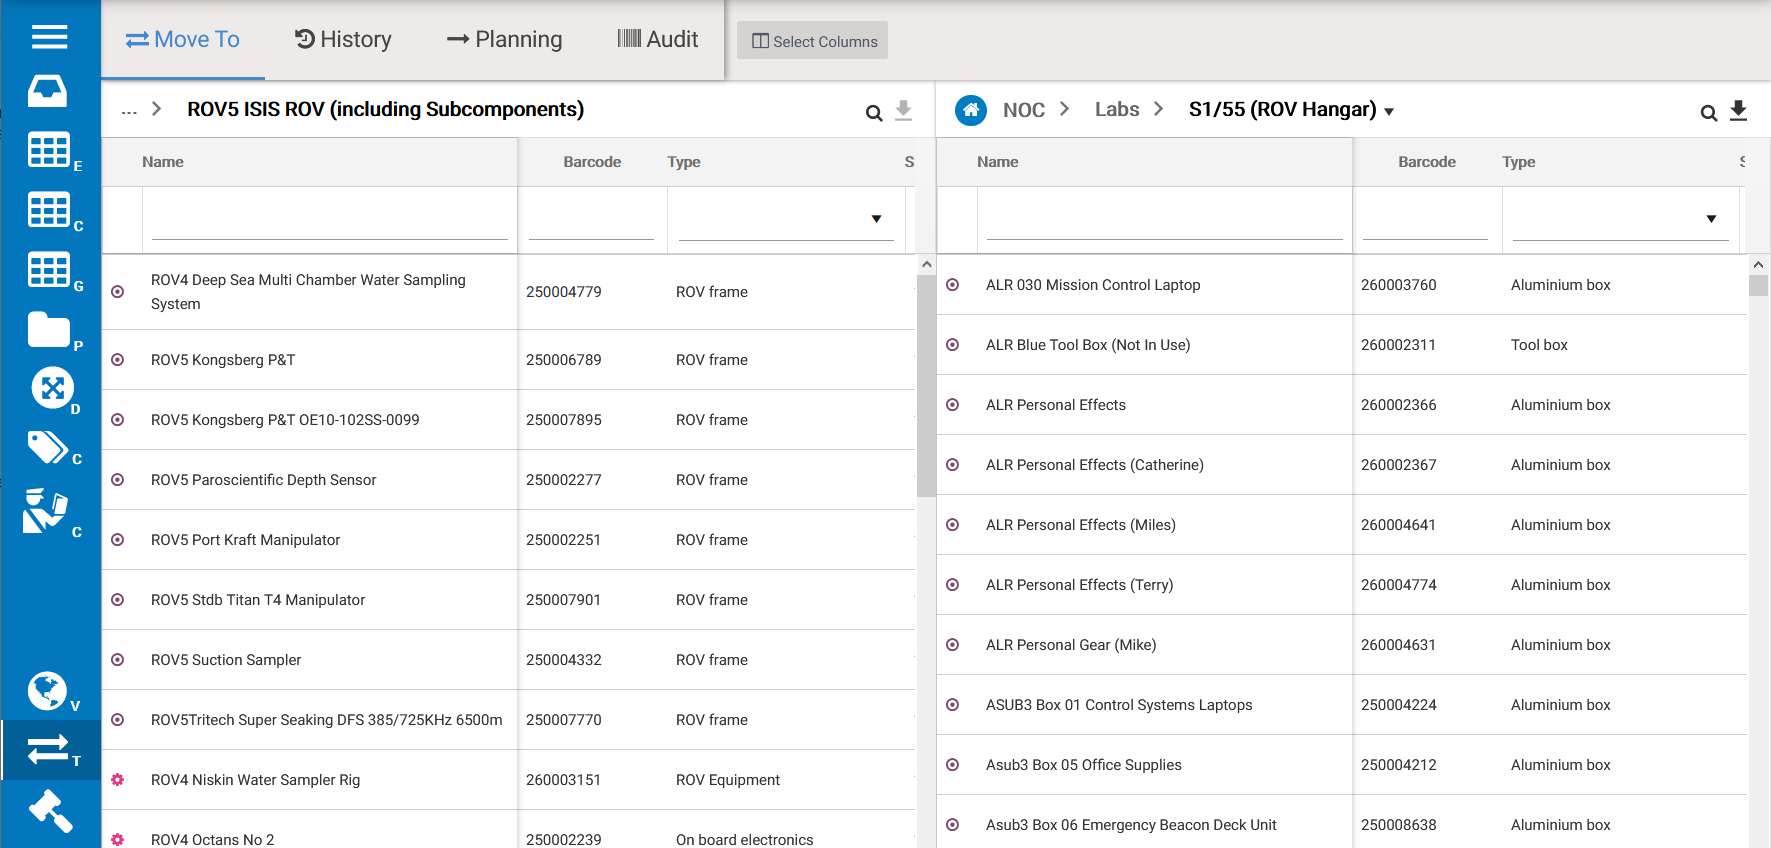
- Contents can then be drag and dropped to your container device. After you added all desired contents, go back to the equipment contents page. You will now see the contents you have just added.
- You can assign contents permanently to the device by clicking on the ‘Set as base location’ button, if required.
![]()