

Planlists
A Planlist is a list containing all devices and consumables intended for a specific transport, cruise or deployment. Transports are used to get equipment from one location to the other, for example from its base or current location to the port of departure prior to a cruise. Or to get equipment back to its storage location when a cruise has ended.
If the transport or cruise for which the Planlist is intended already exists, the Planlist should ideally be linked to this transport or cruise. This will automatically reserve the items on the Planlist for the duration of the transport or cruise. The items can than not be planned by others.
For voyages there are three different mobilization variants which define the reservation of the equipment.
- Mobilize and demobilize on the same voyage. The equipment is mobilized for the start of the voyage and demobilized at the end. The equipment will be reserved for the duration of the voyage.
- Mobilize only. The equipment is mobilized for the start of the voyage and then remains on board or is intended for a mooring deployment. The equipment will be reserved for an indefinite period from the start of the voyage.
- Demobilize only. Equipment is still on board a ship and returning from a previous voyage or mooring deployment. The equipment reservation ends when the voyage ends and the ship is back in port.
NOTE: Unless linked to a voyage or transport, the Planlist is only a shopping list, an intention to transport or deploy equipment. It does not create a reservation for the equipment.
Create a new Planlist
There are two ways to create a new Planlist:
-
- Go to the Planlist Overview page and click on the ‘+’ button. Fill in the form and click ‘Save’.
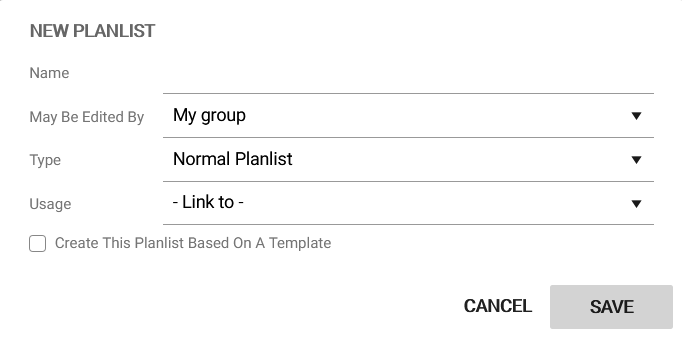
- Go to the Voyages and Transports page, select the cruise for which you want to create a Planlist, click on ‘Mobilisation details’, scroll down to Planlists and click ‘Add Planlist’. Fill in the form, click ‘Save’ and then click on the newly created Planlist.

NOTE: When creating a new Planlist via the Voyages and Transports page, it is not possible to do this based on a Planlist template. If you want to use a Planlist template, please start at the Planlist Overview page.
You are now in the Planlist editor. On the top-left you will find generic options related to the planlist:
Change
Change the name of the planlist, select who has the permissions to edit the planlist, and specify or change the purpose of the planlist (e.g. a specific cruise or transport).
Report
Download documents and files related to your planlist:
- Planlist in Excel format
- Packing list for customs
- Shipping labels for specific equipment on your list
- All documents related to the equipment on your list (e.g. calibration certificates, data sheets and work history)
- ADD DESCRIPTION FOR CONTENT ANALYSIS
Duplicate
Duplicate the planlist.
Move to
Move the entire content of the planlist to a new storage location.
Just below the generic options is the content area of the planlist. On the right side you can browse for items to include on the Planlist such as equipment, consumables and hazardous materials.
Add items to a Planlist
To include an item on the Planlist drag and drop it from the equipment, consumables or hazardous materials page at the right to the content area on the left. For equipment you can use the filters to narrow down the selection:
Availability Filter Only show equipment that is available in a certain deployment time window and have not yet been planned elsewhere in MFP. If the planlist is linked to a movement operation, the data are automatically transferred from there. The time window can also be entered manually.
Custom Filters Filter on person, project, customs type or equipment status.
Select Columns Show or hide columns.
Equipment Owner Select the equipment owner. Default settings is the user’s organization.
Make sure the planlist reflects the actual packing structure. For example, if you need a certain quantity of glass bottles for samples, first drag and drop a box to the planlist. Then drag and drop the glass bottles onto the box in the content area. This will create a tree structure.
Different type of items are denoted with symbols in the Planlist content area and Planlist Overview.
| Equipment | |
| Equipment with overdue maintenance work | |
| Container equipment | |
| Container equipment with overdue maintenance work | |
| Hazardous goods | |
| Consumable (single) | |
| Consumable with hazardous characteristics | |
| Consumable (Multiple) | |
| Consumable (Multiple) with hazardous characteristics |
When adding container equipment with contents to the Planlist, a pop-up appears asking if you also want to include the contents to the list. These contents can consist of items required for deployment or leftovers from a previous deployment. If you are not sure if the contents are required, click ‘Yes’. You can always remove specific content that is not required.

Fig. Include equipment dialogue box.
Equipment that is planned elsewhere for the period of use cannot be included. If you try to include equipment that is already planned for the period in question, a warning message appears and the equipment will not be included. If you try to include multiple equipment items and some of them are already planned elsewhere, none of the equipment items are included. The items already planned elsewhere has to be unchecked first.
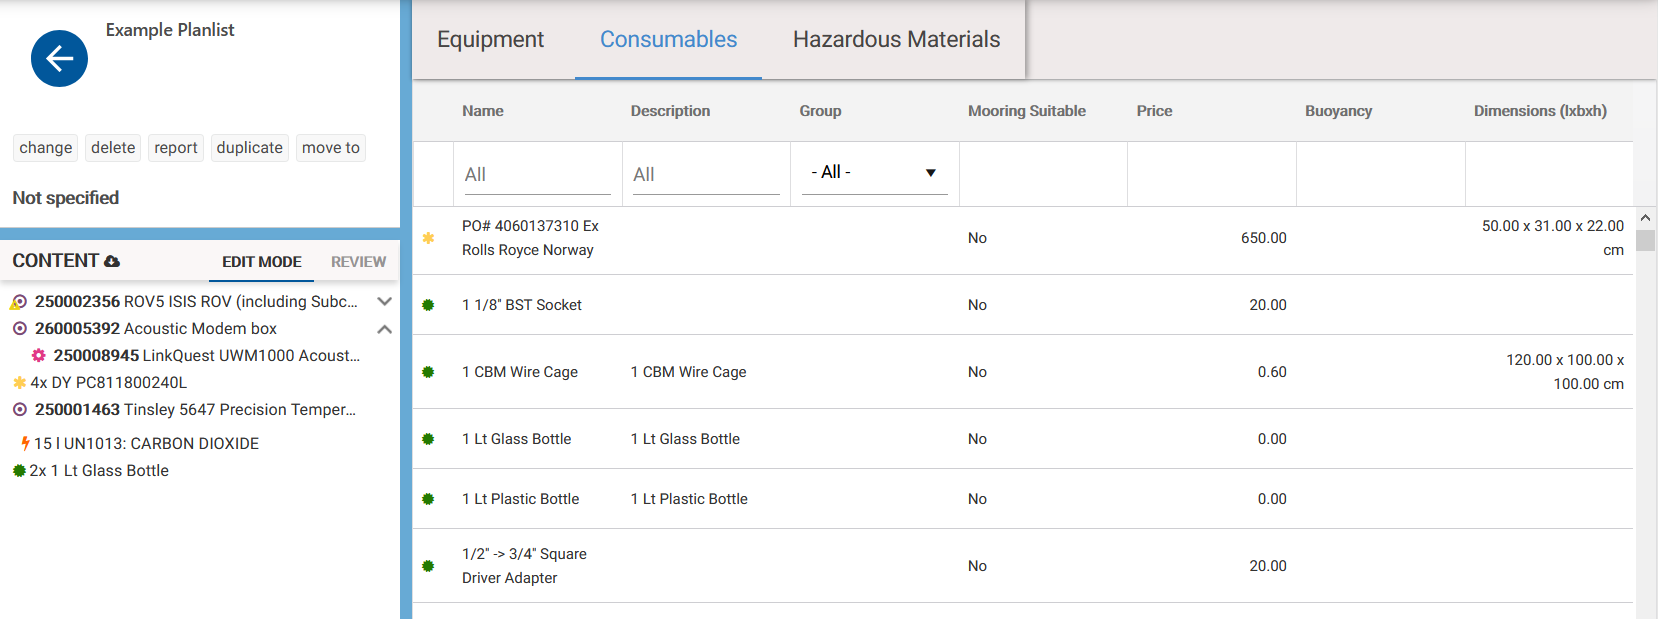
Fig. A Planlist example.
Remove items from a Planlist
To delete an item from the Planlist, select the item in the content area and click ‘Remove from list’ at the top of the content area.
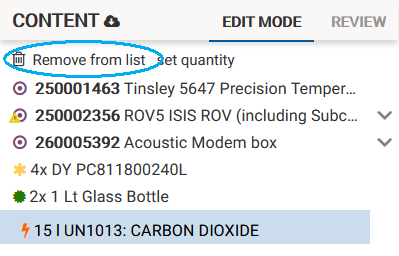
Fig. Remove item from Planlist.