

Transports
Transports can be used to move equipment or other goods between locations or between location and vessel.
Create a new transport
- Go to the ‘Voyages and Transports’ page.
- Click ‘New’.
- Select ‘Transport. This opens the configuration page for the new transport.
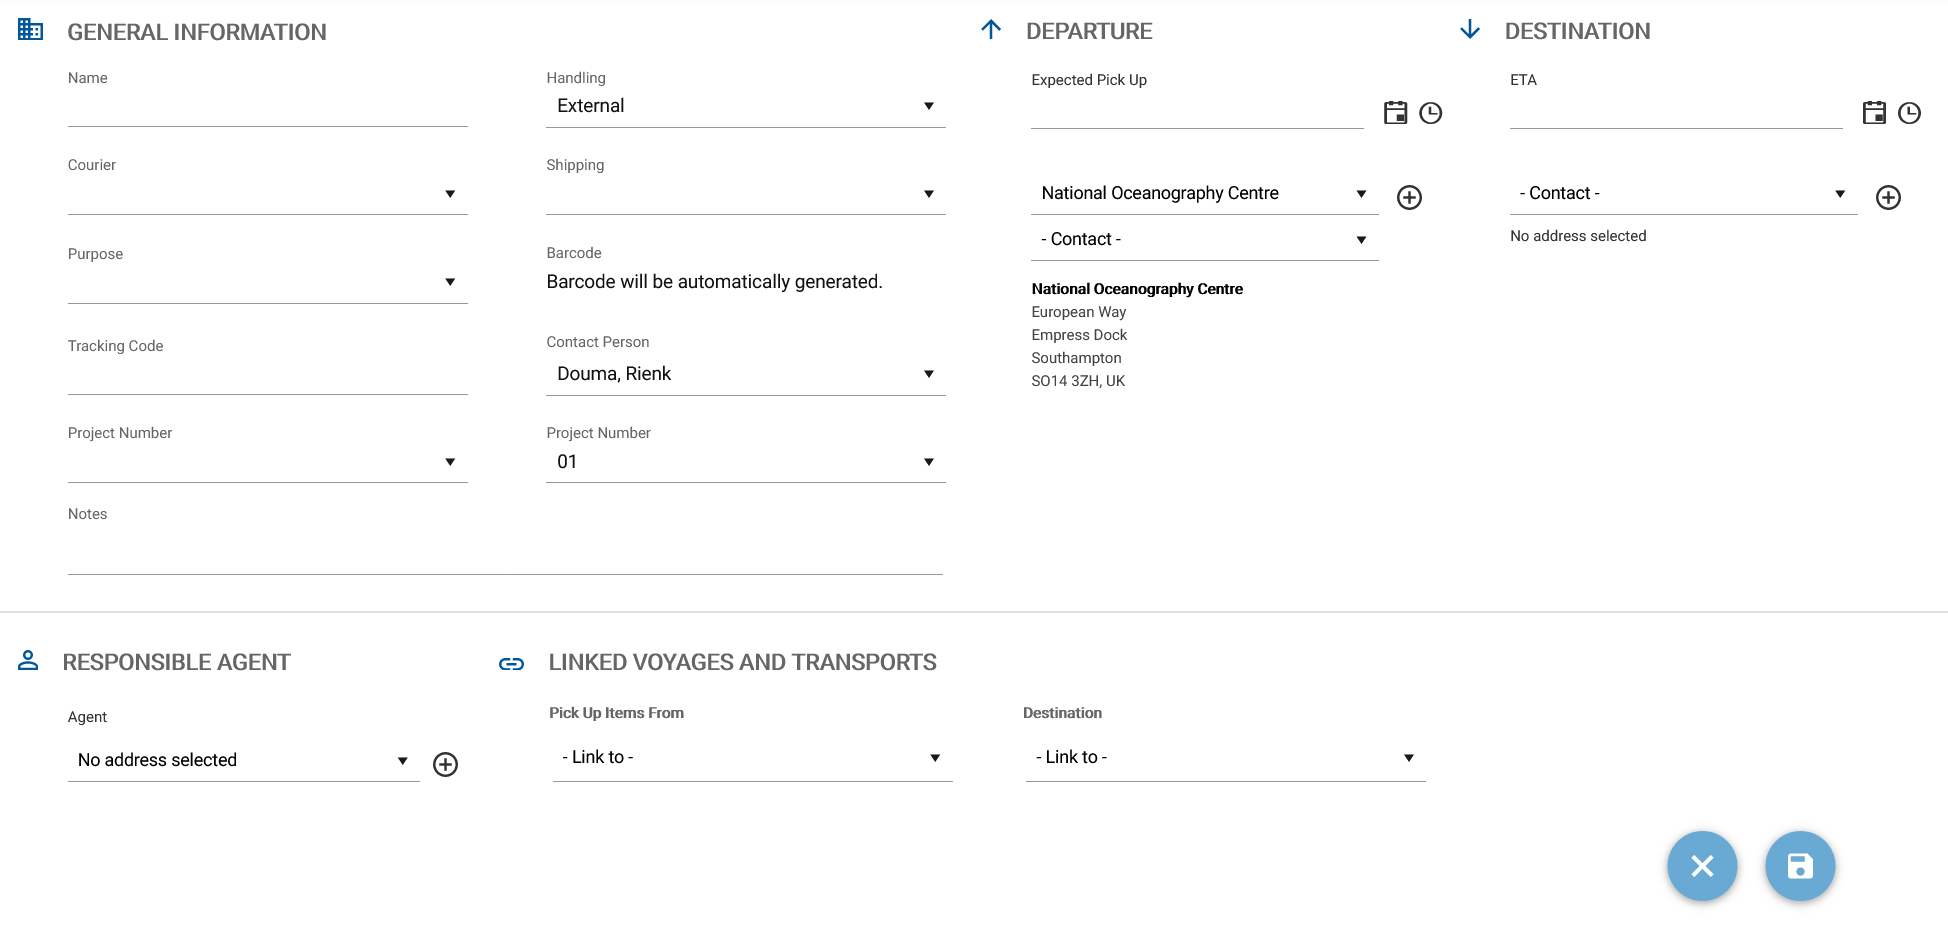
Fig. New transport configuration page.
- Fill out the fields as complete as possible and click the ‘Save’ button to create the new transport.
- After clicking ‘Save’ a pop-up with follow-up actions is opened. Select follow-up actions if required and click ‘Save’.
The transport is now available in the Voyages and transports overview, with status ‘Planning’. When the transport departs, status will change to ‘Active’. You can now add existing Planlists to the transport, create a new Planlist, or upload documents.
Add new transport form fields
| Field | Description |
| Name | Name of the transport |
| Courier | Select a courier from the list |
| Purpose | Select the purpose of the transport |
| Tracking Code | The tracking code |
| Project Number | Select a project from the list |
| Notes | Any additional information |
| Handling | Internal or External |
| Shipping | The type of shipping (e.g., air freight or ship) |
| Bar Code | Automatically generated bar code |
| Contact Person | The name of the contact person for this transport |
| Project Number | Sequential number for the selected project |
| Expected Pick Up | Expected date/time for the pick-up |
| Departure Contact | Select a contact from the list or add a new contact |
| ETA | Estimated date/time of transport arrival |
| Auto arrive transport | When checked, the arrival is automatically registered on ETA |
| Destination Contact | Select a contact from the list or add a new contact |
| Entry Processing Unit | |
| Custom Entry FCG | |
| Customs Entry CW | |
| Agent | Select an agent from the lust or add a new agent |
| Pick Up Items From | Select a voyage/cruise or transport from which the items should be picked up |
| Destination | Select a voyage/cruise or transport to which the items should be delivered |
NOTE: Please note that when ‘cruise/voyage’ was selected under ‘purpose’, you will be reminded to link the transport to the cruise/voyage the equipment is meant for. Linking transports to cruises has advantages, such as an actual reservation of the selected equipment and automatic loading of the equipment during mobilisation.
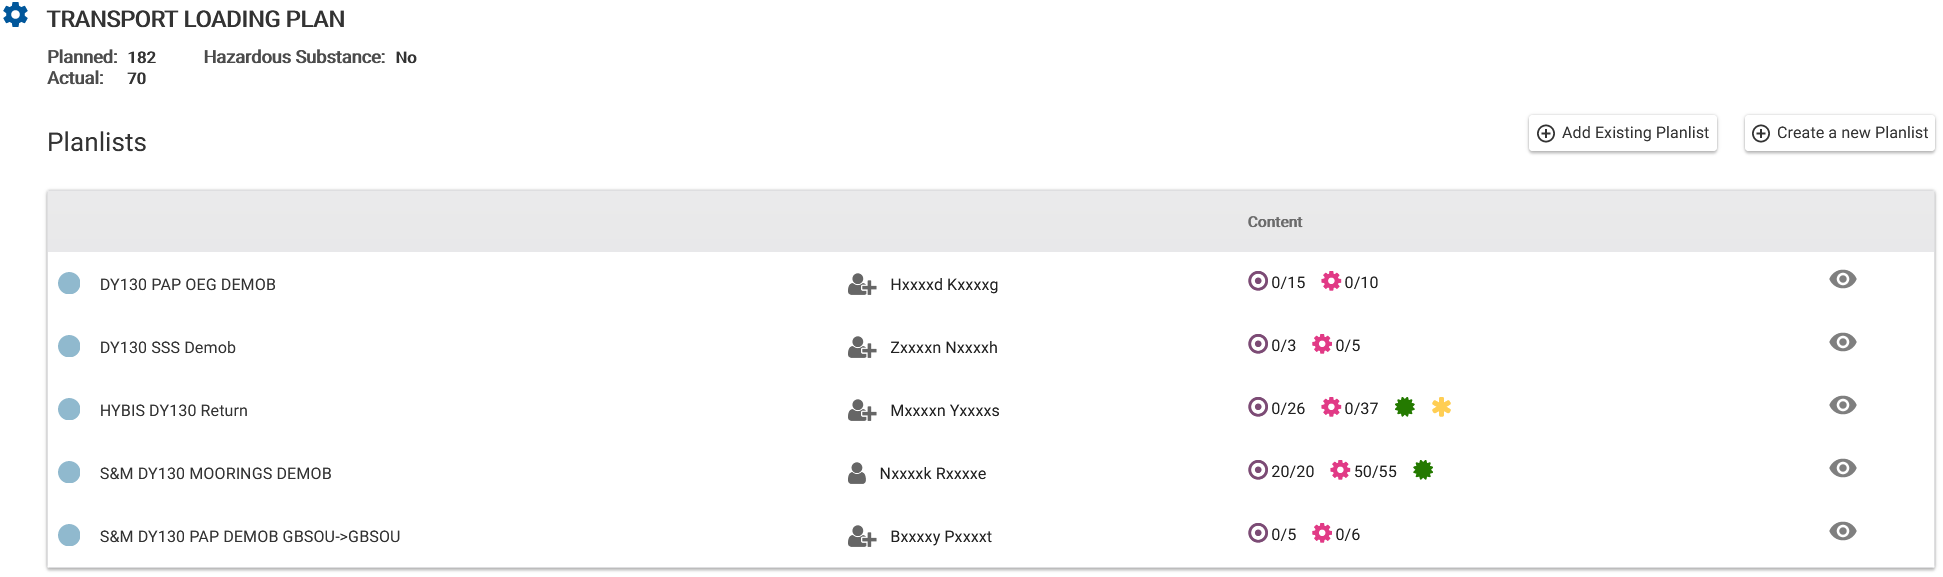
Fig. Transport loading plan example.
Load Planlist items prior to departure
The Planlist, or specific Planlist content must be loaded prior to departure. Loaded items will be displayed as ‘Actual’ under the Transport Loading Plan and the transport will become the ‘current location’ of the equipment. Once the transport has departed loading is no longer possible. Click ‘Load’ to start loading. This will bring you to the Tracking page. On the left side you will see the transport. On the right side you can browse to a Planlist. See the table below for a description of the grouping. Using drag and drop you can add a complete Planlist, or specific items from a Planlist, to the transport.
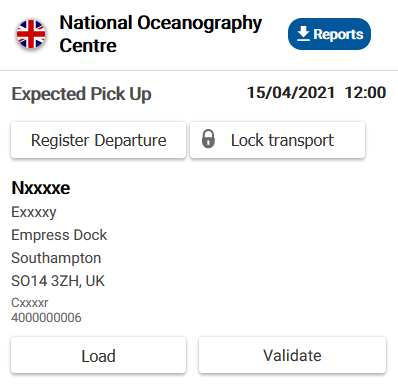
Fig. Options related to departure.
All (flat) All items on all planning lists belonging to the transport are displayed, without consideration of the package structure; items can only be loaded individually.
All (hierarchy) All items on all planning lists belonging to the transport are displayed in the package structure; items or packages can be loaded individually here.
Other planlists All Planlists belonging to the transport that were created by other MFP users are displayed; each Planlist is loaded completely in one go, a query is made from which storage locations the multiples are to be loaded on the Planlist.
Own planlists All the Planlists belonging to the transport that you have created yourself are displayed; each Planlist is loaded completely in one go, a query is made from which storage locations the multiples on the Planlist are to be loaded.
![]() Generate reports
Generate reports
Different reports can be generated, such as a packing list or a proforma invoice for customs. Use to open the selection of reports that can be generated. Select a report from the list and click ‘Create Report’.
Registering departure and arrival
When the transport is picked up by the courier, the departure should be registered in MFP. The status will then change from ‘planning’ to ‘Active’. At this stage, it is no longer possible to load equipment onto the transport.
Upon arrival of the transport at the destination, the arrival should be registered in MFP. If the transport was linked to a cruise, the equipment will automatically be transferred to the ship when mobilisation is registered. If the arrival of the linked transport wasn’t registered, you will receive a message if you try to register the departure of the ship, notifying you that a linked transport has not been loaded and asking if you want to load the equipment now.
When creating a transport you can check ‘Auto arrive transport’